本文告诉大家如何通过修改 ItemContainerStyle 让 ListView 或 ListBox 的选择效果如鼠标移动到未选中项的效果或选择项的背景
先写一些简单的代码用于界面的绑定
    public partial class MainWindow : Window    {        public MainWindow()        {
            InitializeComponent();            DataContext = this;            Items = new List<Item> { new Item(1), new Item(2), new Item(3) };        }
        public List<Item> Items { get; set; }    }
    public class Item    {        public Item(int id)        {            Id = id;        }
        public int Id { get; set; }        public string Text { get => $"This is Item number {Id}"; }    }
在界面放一个 ListView 默认在鼠标移动到没有被选择的项的时候会出现背景
<ListView ItemsSource="{Binding Items}"> <ListView.ItemTemplate> <DataTemplate DataType="local:Item"> <StackPanel> <TextBlock Text="{Binding Id}" /> <TextBlock Text="{Binding Text}" /> </StackPanel> </DataTemplate> </ListView.ItemTemplate> </ListView>通过写样式在 ItemContainerStyle 可以让 ListView 的在鼠标移动到未选择项的特效的颜色修改
       <!-- set SelectedBackgroundColor to Transparent when you do not need the background in selected items -->        <Color x:Key="SelectedBackgroundColor">#00FFFFFF</Color>        <Color x:Key="SelectedUnfocusedColor">#FFB2A3A2</Color>
        <!-- set the MouseOverColor to Transparent when you do not need the effect in the unselected items -->        <Color x:Key="MouseOverColor" >#00FFFFFF</Color>
        <Style x:Key="ListViewItemStyle"               TargetType="ListViewItem">            <Setter Property="SnapsToDevicePixels"                    Value="true" />            <Setter Property="OverridesDefaultStyle"                    Value="true" />            <Setter Property="Template">                <Setter.Value>                    <ControlTemplate TargetType="ListBoxItem">                        <Border x:Name="Border"                                Padding="2"                                SnapsToDevicePixels="true"                                Background="Transparent">                            <VisualStateManager.VisualStateGroups>                                <VisualStateGroup x:Name="CommonStates">                                    <VisualState x:Name="Normal" />                                    <VisualState x:Name="MouseOver" >                                        <Storyboard>                                            <ColorAnimationUsingKeyFrames Storyboard.TargetName="Border"                                                                          Storyboard.TargetProperty="(Panel.Background).                    (SolidColorBrush.Color)">                                                <EasingColorKeyFrame KeyTime="0"                                                                     Value="{StaticResource MouseOverColor}" />                                            </ColorAnimationUsingKeyFrames>                                        </Storyboard>                                    </VisualState>                                    <VisualState x:Name="Disabled" />                                </VisualStateGroup>                                <VisualStateGroup x:Name="SelectionStates">                                    <VisualState x:Name="Unselected" />                                    <VisualState x:Name="Selected">                                        <Storyboard>                                            <ColorAnimationUsingKeyFrames Storyboard.TargetName="Border"                                                                          Storyboard.TargetProperty="(Panel.Background).                    (SolidColorBrush.Color)">                                                <EasingColorKeyFrame KeyTime="0"                                                                     Value="{StaticResource SelectedBackgroundColor}" />                                            </ColorAnimationUsingKeyFrames>                                        </Storyboard>                                    </VisualState>                                    <VisualState x:Name="SelectedUnfocused">                                        <Storyboard>                                            <ColorAnimationUsingKeyFrames Storyboard.TargetName="Border"                                                                          Storyboard.TargetProperty="(Panel.Background).                    (SolidColorBrush.Color)">                                                <EasingColorKeyFrame KeyTime="0"                                                                     Value="{StaticResource SelectedUnfocusedColor}" />                                            </ColorAnimationUsingKeyFrames>                                        </Storyboard>                                    </VisualState>                                </VisualStateGroup>                            </VisualStateManager.VisualStateGroups>                            <ContentPresenter />                        </Border>                    </ControlTemplate>                </Setter.Value>            </Setter>        </Style>
可以直接使用上面的代码,如果想要让用户看不到鼠标移动到未选中项的特效可以设置 MouseOverColor 为透明,通过设置 SelectedBackgroundColor 可以让选中项的背景修改
因为颜色在 WPF 使用 #AARRBBGG 表示,如上面代码设置了 #00FFFFFF 就是透明,因为第一个 Alpha 为 0 也就是透明
在 ListView 使用刚才写的样式,运行代码可以看到下面图片
<ListView ItemsSource="{Binding Items}" ItemContainerStyle="{StaticResource ListViewItemStyle}"> <ListView.ItemTemplate> <DataTemplate DataType="local:Item"> <StackPanel> <TextBlock Text="{Binding Id}" /> <TextBlock Text="{Binding Text}" /> </StackPanel> </DataTemplate> </ListView.ItemTemplate> </ListView>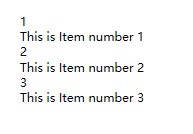
https://stackoverflow.com/a/53557393/6116637

本作品采用 知识共享署名-非商业性使用-相同方式共享 4.0 国际许可协议 进行许可。 欢迎转载、使用、重新发布,但务必保留文章署名 林德熙 (包含链接: https://blog.lindexi.com ),不得用于商业目的,基于本文修改后的作品务必以相同的许可发布。如有任何疑问,请与我 联系。