本文告诉大家如何使用资源在后台创建控件,本文使用按钮做例子,包括如何绑定资源,找到资源。
定义资源
在 App.xaml 定义的资源样式可以在整个程序拿到,但是不建议在 App.xaml 直接写资源,建议是写一个资源文件,例如是 SormarMapay.xaml 在 App.xaml 用ResourceDictionary.MergedDictionaries合并
<Application.Resources> <ResourceDictionary> <ResourceDictionary.MergedDictionaries> <ResourceDictionary Source="SormarMapay.xaml"></ResourceDictionary> </ResourceDictionary.MergedDictionaries> </ResourceDictionary> </Application.Resources>现在可以打开 SormarMapay.xaml 写样式,这里需要写一个按钮的样式,就需要设置TargetType="Button",例如这个按钮需要一张图片和标题、次标题
<ResourceDictionary    xmlns="http://schemas.microsoft.com/winfx/2006/xaml/presentation"    xmlns:x="http://schemas.microsoft.com/winfx/2006/xaml">    <Style x:Key="CustomButtonLarge" TargetType="Button">        <Setter Property="Background" Value="Black" />        <Setter Property="Foreground" Value="White" />        <Setter Property="HorizontalAlignment" Value="Center" />        <Setter Property="VerticalAlignment" Value="Top" />        <Setter Property="Margin" Value="10,10,10,10"></Setter>        <Setter Property="Height" Value="200" />        <Setter Property="Width" Value="100" />        <Setter Property="Template">            <Setter.Value>                <ControlTemplate TargetType="Button" >                    <Grid x:Name="AlbumContentGrid" Background="{TemplateBinding Background}" >                        <Grid.RowDefinitions>                            <RowDefinition Height="200*"/>                            <RowDefinition Height="Auto"/>                            <RowDefinition Height="Auto"/>                        </Grid.RowDefinitions>
<Image x:Name="AlbumCover" Grid.Row="0" Source="{Binding Path=Image}"/> <TextBlock x:Name="Title" Grid.Row="1" Margin="10,10,10,10" Text="{Binding Title}" Foreground="{TemplateBinding Foreground}"/> <TextBlock x:Name="SubTitle" Grid.Row="2" Margin="10,10,10,10" Text="{Binding SubTitle}" Foreground="{TemplateBinding Foreground}"/> </Grid> </ControlTemplate> </Setter.Value> </Setter> </Style></ResourceDictionary>这里需要解释一下,使用的<Grid x:Name="AlbumContentGrid" Background="{TemplateBinding Background}" >是为了让按钮的背景有用,如果没有设置这个值,也就是按钮的背景设置了是没有用的。
里面的控件使用的是x:Name="AlbumCover"而不是 x:Key ,因为只能使用name的方法。
为了在后台代码可以修改按钮的内容,就需要使用绑定 DataContext ,这时绑定只能用 Binding 的方法,如果大家发现如何在这里使用 x:bind 请告诉我
定义数据
这里使用的数据需要自己定义,下面代码定义一直类
    public class Foo    {        public BitmapImage Image { get; set; }
        public string Title { get; set; }
        public string  SubTitle { get; set; }    }
创建按钮
在 Main 页面添加下面代码,用来创建多个按钮
public MainPage() { this.InitializeComponent();
Loaded += MainPage_Loaded; }
private void MainPage_Loaded(object sender, RoutedEventArgs e) { int numberOfButtons = 3;
for (int i = 0; i < numberOfButtons; i++) { var foo = new Foo { Image = new BitmapImage(new Uri("ms-appx:///Assets/Square44x44Logo.scale-200.png")), Title = "title" + i, SubTitle = i.ToString() };
Button btn = new Button(); Style style = Application.Current.Resources["CustomButtonLarge"] as Style;
btn.Style = style;
btn.DataContext = foo;
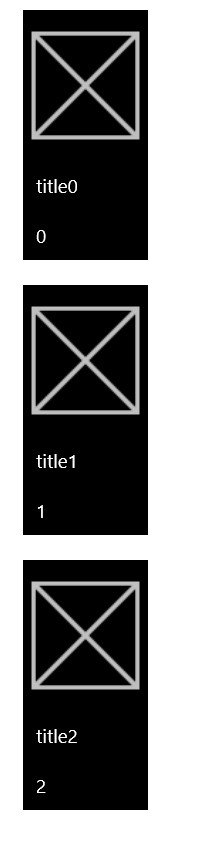
StackAlbums.Children.Add(btn); } }上面的 StackAlbums 就是一个 StackPanel ,现在运行代码可以看到下面界面
添加动画
如果使用了上面的代码可以看到,这个界面按钮是不存在按下的动画,因为没有写 VisualStateManager 现在打开 SormarMapay.xaml 在 AlbumContentGrid 添加下面代码
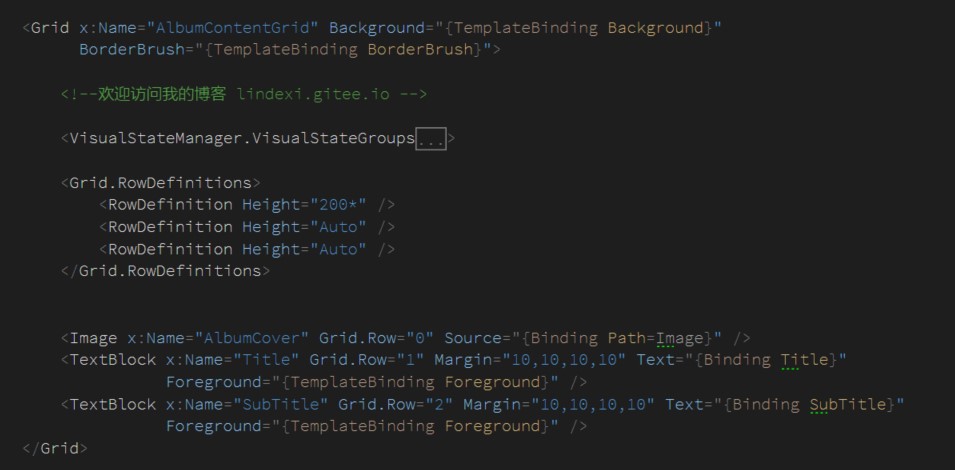
<VisualStateManager.VisualStateGroups> <VisualStateGroup x:Name="CommonStates"> <VisualState x:Name="Normal"> <Storyboard> <PointerUpThemeAnimation Storyboard.TargetName="AlbumContentGrid" /> </Storyboard> </VisualState> <VisualState x:Name="PointerOver"> <Storyboard> <ObjectAnimationUsingKeyFrames Storyboard.TargetName="AlbumContentGrid" Storyboard.TargetProperty="BorderBrush"> <DiscreteObjectKeyFrame KeyTime="0" Value="{ThemeResource SystemControlHighlightBaseMediumLowBrush}" /> </ObjectAnimationUsingKeyFrames> <ObjectAnimationUsingKeyFrames Storyboard.TargetName="Title" Storyboard.TargetProperty="Foreground"> <DiscreteObjectKeyFrame KeyTime="0" Value="#aaaaaa" /> </ObjectAnimationUsingKeyFrames> <ObjectAnimationUsingKeyFrames Storyboard.TargetName="SubTitle" Storyboard.TargetProperty="Foreground"> <DiscreteObjectKeyFrame KeyTime="0" Value="#aaaaaa" /> </ObjectAnimationUsingKeyFrames> <PointerUpThemeAnimation Storyboard.TargetName="AlbumContentGrid" /> </Storyboard> </VisualState> <VisualState x:Name="Pressed"> <Storyboard> <ObjectAnimationUsingKeyFrames Storyboard.TargetName="AlbumContentGrid" Storyboard.TargetProperty="Background"> <DiscreteObjectKeyFrame KeyTime="0" Value="{ThemeResource SystemControlBackgroundBaseMediumLowBrush}" /> </ObjectAnimationUsingKeyFrames> <ObjectAnimationUsingKeyFrames Storyboard.TargetName="AlbumContentGrid" Storyboard.TargetProperty="BorderBrush"> <DiscreteObjectKeyFrame KeyTime="0" Value="{ThemeResource SystemControlHighlightTransparentBrush}" /> </ObjectAnimationUsingKeyFrames> <ObjectAnimationUsingKeyFrames Storyboard.TargetName="Title" Storyboard.TargetProperty="Foreground"> <DiscreteObjectKeyFrame KeyTime="0" Value="{ThemeResource SystemControlHighlightBaseHighBrush}" /> </ObjectAnimationUsingKeyFrames> <ObjectAnimationUsingKeyFrames Storyboard.TargetName="SubTitle" Storyboard.TargetProperty="Foreground"> <DiscreteObjectKeyFrame KeyTime="0" Value="{ThemeResource SystemControlHighlightBaseHighBrush}" /> </ObjectAnimationUsingKeyFrames> <PointerDownThemeAnimation Storyboard.TargetName="AlbumContentGrid" /> </Storyboard> </VisualState> </VisualStateGroup> </VisualStateManager.VisualStateGroups>然后在 AlbumContentGrid 绑定一下 BorderBrush ,请看代码
Grid x:Name="AlbumContentGrid" Background="{TemplateBinding Background}" BorderBrush="{TemplateBinding BorderBrush}"现在代码看起来就是这样
尝试运行一下代码,可以看到按下动画

本作品采用 知识共享署名-非商业性使用-相同方式共享 4.0 国际许可协议 进行许可。 欢迎转载、使用、重新发布,但务必保留文章署名 林德熙 (包含链接: https://blog.lindexi.com ),不得用于商业目的,基于本文修改后的作品务必以相同的许可发布。如有任何疑问,请与我 联系。